


In this tutorial I'm going to show you how to create a simple styled minimap to use in your Virtual Earth Silverlight projects that looks exactly like the one we used in our Twittermap demo.
As those of you who have already tried the CTP control there is a lot of things we take for granted with the javascript control that required some work to achieve in Silverlight, the minimap is one of these but thankfully its really easy to create your own.
Getting Started
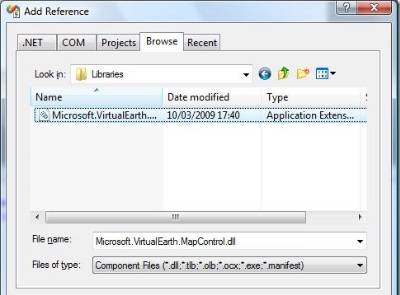
Assuming you already have your Silverlight development environment setup and have installed the Virtual Earth Silverlight CTP then start by creating a new Silverlight project, or use your existing project. First you need to add a reference to the Virtual Earth Silverlight control to your Silverlight project:

Then add a simple Virtual Earth map control to your page.xaml as follows:
<UserControl x:Class="MinimapDemo.MainPage" xmlns="https://schemas.microsoft.com/winfx/2006/xaml/presentation";
    xmlns:x="https://schemas.microsoft.com/winfx/2006/xaml";
    xmlns:m="clr-namespace:Microsoft.VirtualEarth.MapControl;assembly=Microsoft.VirtualEarth.MapControl">
    <Grid x:Name="LayoutRoot" Background="White">
        <m:Map Name="mymap" Mode="AerialWithLabels" >
        </m:Map>
    </Grid>
</UserControl>
Notice we have made our base usercontrol fill the entire screen by removing the width and height attributes, then we have added a xmlns namespace pointing to the virtual earth control and finally added a map to the xaml in ArialWithLabels mode.
Creating then MiniMap Control
Now we need to create the minimap itself, to do this we are going to create a new usercontrol in the Silverlight project. Right mouse click on the project file and click ''Add, New Item then choose Silverlight User Control. Name the control MinMap.xaml.
Now we need to add a Virtual Earth map control to this new minimap control, in the same way we did for the main map in page.xaml:
<UserControl x:Class="MinimapDemo.MiniMap"
    xmlns="https://schemas.microsoft.com/winfx/2006/xaml/presentation";
  xmlns:x="https://schemas.microsoft.com/winfx/2006/xaml";
    Width="208" Height="208"
    xmlns:m="clr-namespace:Microsoft.VirtualEarth.MapControl;assembly=Microsoft.VirtualEarth.MapControl">
    <Grid x:Name="LayoutRoot">
        <Canvas Canvas.ZIndex="99" Width="200" Height="200" HorizontalAlignment="Right" VerticalAlignment="Top" Margin="5">
            <m:Map Name="minimap" Width="200" Height="200" Mode="Road" LogoVisibility="Collapsed" ScaleVisibility="Collapsed" CopyrightVisibility="Collapsed" NavigationVisibility="Collapsed">
            </m:Map>
        </Canvas>
    </Grid>
</UserControl>
This time we have set the base usercontrol to have a width and height of 208 pixels and the map control to have a width and height of 200 pixels these are to set the size of our minimap control and you will see later why the map doesn't quiet fill the usercontrol. We have added a Canvas control to the grid and used this to Horizontally align the map to the right and vertically align the map to the top when added to a parent control. It's also added a margin of 5 pixels so that the minimap will be slightly in from the edge of the parent map we are going to add it to. One final thing the canvas provides is setting the z-index, this ensures the minimap control will always be on top of any of the parent maps controls.
We have also added quiet a few attributes to the map control, setting the map to Road style, hiding the logos, navigation, copyrights and scale bar.
Now its time to style the minimap a bit, something we didn't have allot of flexibility over with the javascript api. We are going to make the map circular and add a opaque white border around the map:
<UserControl x:Class="MinimapDemo.MiniMap"
    xmlns="https://schemas.microsoft.com/winfx/2006/xaml/presentation";
    xmlns:x="https://schemas.microsoft.com/winfx/2006/xaml";
    Width="208" Height="208"
    xmlns:m="clr-namespace:Microsoft.VirtualEarth.MapControl;assembly=Microsoft.VirtualEarth.MapControl">
    <Grid x:Name="LayoutRoot">
        <Canvas Canvas.ZIndex="99" Width="200" Height="200" HorizontalAlignment="Right" VerticalAlignment="Top" Margin="5">
            <m:Map Name="minimap" Width="200" Height="200" Mode="Road" LogoVisibility="Collapsed" ScaleVisibility="Collapsed" CopyrightVisibility="Collapsed" NavigationVisibility="Collapsed">
                <m:Map.Clip>
                    <EllipseGeometry RadiusX="94" RadiusY="94" Center="100,100" />
                </m:Map.Clip>
            </m:Map>
            <Ellipse Width="200" Height="200" Stroke="White" StrokeThickness="6" Opacity="0.7" />
        </Canvas>
    </Grid>
</UserControl>
We have added 2 things this time, a clipping path to the map control by adding an Ellipse to the Map.Clip tag and adding another Ellipse as a sibling control with a white line (stroke) 6 pixels wide and slightly opaque. In the xaml preview the control now looks like this:

There is one final touch to add to the minimap control before we start working on integrating it with the main map and that is adding a centre marker to the minimap.
<UserControl x:Class="MinimapDemo.MiniMap"
    xmlns="https://schemas.microsoft.com/winfx/2006/xaml/presentation";
    xmlns:x="https://schemas.microsoft.com/winfx/2006/xaml";
    Width="208" Height="208"
    xmlns:m="clr-namespace:Microsoft.VirtualEarth.MapControl;assembly=Microsoft.VirtualEarth.MapControl">
    <Grid x:Name="LayoutRoot">
        <Canvas Canvas.ZIndex="99" Width="200" Height="200" HorizontalAlignment="Right" VerticalAlignment="Top" Margin="5">
            <m:Map Name="minimap" Width="200" Height="200" Mode="Road" LogoVisibility="Collapsed" ScaleVisibility="Collapsed" CopyrightVisibility="Collapsed" NavigationVisibility="Collapsed">
                <m:Map.Clip>
                    <EllipseGeometry RadiusX="94" RadiusY="94" Center="100,100" />
                </m:Map.Clip>
            </m:Map>
            <Ellipse Width="200" Height="200" Stroke="White" StrokeThickness="6" Opacity="0.7" />
            <Ellipse Height="6" Width="6" Fill="#FFFF0000" HorizontalAlignment="Center" VerticalAlignment="Center" Margin="98,98,0,0" />
        </Canvas>
    </Grid>
</UserControl>
We have done this by adding another Ellipse as a sibling to the map control that is 6 pixels wide and high, coloured red and positioned in the middle of our control using a combination of alignments and margins.
Now lets get the maps working together!
Combining Both Maps
To make the minimap actually work as a minimap we need to add a few events and two properties to the minimap's map control. The events will stop the minimap reacting to a users mouse events, we add these to both the xaml and the code behind:
XAML
<m:Map Name="minimap"
       Width="200"
       Height="200"
       Mode="Road"
       LogoVisibility="Collapsed"
       ScaleVisibility="Collapsed"
       CopyrightVisibility="Collapsed"
       NavigationVisibility="Collapsed"
       MouseClick="Map_MouseClick"
       MouseWheel="Map_MouseWheel"
       MousePan="Map_MousePan">
Codebehind
namespace MinimapDemo
{
    public partial class MiniMap : UserControl
    {
        public MiniMap()
        {
            InitializeComponent();
        }

        private void Map_MouseClick(object sender, Microsoft.VirtualEarth.MapControl.MapMouseEventArgs e)
        {
            e.Handled = true;//dont want minimap to be interactive
        }

   private void Map_MouseWheel(object sender, Microsoft.VirtualEarth.MapControl.MapMouseWheelEventArgs e)
        {
            e.Handled = true;//dont want minimap to be interactive
        }

        private void Map_MousePan(object sender, Microsoft.VirtualEarth.MapControl.MapMouseDragEventArgs e)
        {
            e.Handled = true;//dont want minimap to be interactive
        }
    }
}
The 3 mouse events have set the event as handled so the default events the map control has for these will not be executed. Now onto the two properties we need to add, these are simply adding a property to control where the minimap is centred geographically and one for its zoomlevel.
public Location Center
{
    get
    {
        return minimap.Center;
    }

    set
    {
        minimap.Center = value;
    }
}

public double ZoomLevel
{
    get
    {
        return minimap.ZoomLevel;
    }

    set
    {
        minimap.ZoomLevel = value;
    }
}
You will need to add using Microsoft.VirtualEarth.MapControl; to the code behind before it recognises the Location class. Now before we go any further build the project so that we have the minimap control available.
Now lets actually add the new minimap control to the main page.xaml:
<UserControl x:Class="MinimapDemo.MainPage"
    xmlns="https://schemas.microsoft.com/winfx/2006/xaml/presentation"
    xmlns:x="https://schemas.microsoft.com/winfx/2006/xaml"
    xmlns:m="clr-namespace:Microsoft.VirtualEarth.MapControl;assembly=Microsoft.VirtualEarth.MapControl"
    xmlns:mm="clr-namespace:MinimapDemo">
    <Grid x:Name="LayoutRoot" Background="White">
        <m:Map Name="mymap" Mode="AerialWithLabels">
            <m:Map.Children>
                <mm:MiniMap Name="minimap" HorizontalAlignment="Right" VerticalAlignment="Top" />
            </m:Map.Children>
        </m:Map>
    </Grid>
    </UserControl>
We have added an xml namespace at the top pointing to the current project, this will allow us to use the minimap control. Then we have added the minimap to the Map.Children tag and positioned it in the top right of the map.
We are almost there now, there is just one final thing to do. We need to hook up the main maps TargetViewChanged event so that it moves the minimap to a new location and sets the zoom level appropriately. We do this by adding the event to the xaml and then adding something to the code behind to change the minimap:
XAML
<m:Map Name="mymap" Mode="AerialWithLabels" TargetViewChanged="Map_TargetViewChanged">
Codebehind
private void Map_TargetViewChanged(object sender, Microsoft.VirtualEarth.MapControl.MapEventArgs e)
{
    MiniMap minimap = (MiniMap)mymap.FindName("minimap");//get the minimap child control
    minimap.Center = mymap.Center;//change center of mini map
    minimap.ZoomLevel = (mymap.ZoomLevel - 5) < 0 ? 1 : (mymap.ZoomLevel - 5);//make sure minimap is at least zoomlevel 1
}
In the codebehind first we are finding the minimap control by name from its parent map control (for some reason I have to do it this way where as previously I have just been able to call minimap directly??). Then we are setting the minimap's Center property to be the same as the main map and finally setting the ZoomLevel property to be 5 less than the main map, unless the main map is zoomed out to level 5 or below itself. That's if we're done you should now be able to run the project and load up your working minimap!

What else can we do?
You can tweak things for your own requirements like the zoom level offset and the size of the minimap pretty easily. You can also make a more exciting centrepoint marker for the minimap using some simple animation but that's outside the scope of this tutorial. I look forward to seeing some great projects over the next few weeks so get busy building!
UPDATE: John Darling pointed out the minimap in this code seems to be one step behind the main map, after having a look we should be using the zoomlevel and centerpoint of the TargetView (view that the map is currently animating to) rather than the current maps state. Therefore the updated event handler for Map_TargetViewChanged should be:
private void Map_TargetViewChanged(object sender, Microsoft.VirtualEarth.MapControl.MapEventArgs e)
{
    MiniMap minimap = (MiniMap)mymap.FindName("minimap");//get the minimap child control
    minimap.Center = mymap.TargetView.Center;//change center of mini map
    minimap.ZoomLevel = (mymap.TargetView.ZoomLevel - 5) < 0 ? 1 : (mymap.TargetView.ZoomLevel - 5);//make sure minimap is at least zoomlevel 1
}


